Appearance
General Tab
Clicking on the 'Add New Program' field will bring you to the screen below. This section will show you how to set up the 'General' tab for your event.
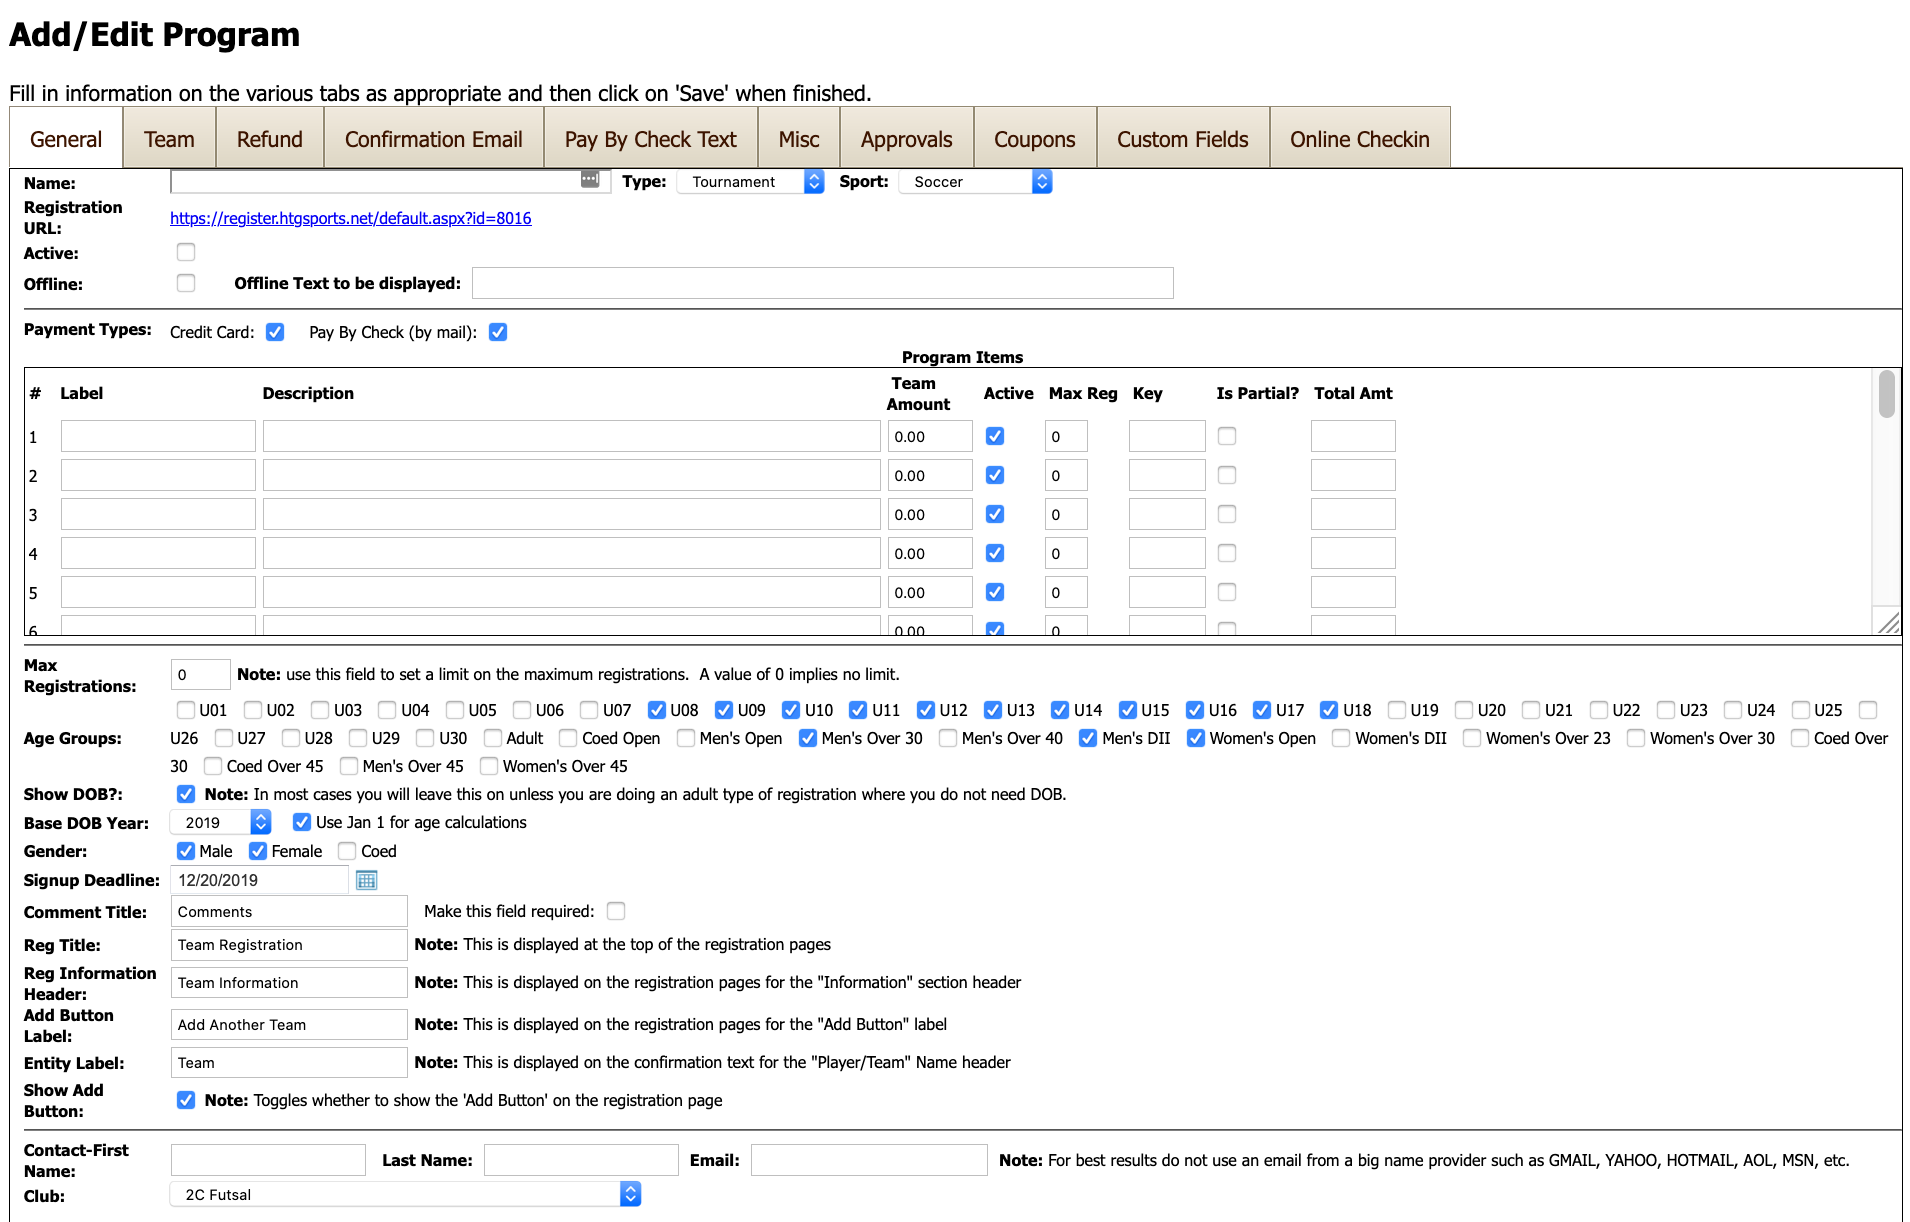
Program Name: In the first field, create a program name. This will be the title of the program that will appear under tournament listings, schedules, etc.
Program Type: In the second field, select ‘Tournament’ as the Type for a tournament. Select ‘Team/League’ as the Type for a league. Select ‘Player’ for an event where individuals will register, such as a clinic or camp. When ‘Tournament’ or ‘Team/League’ is selected as the type, the second navigational tab will be displayed as ‘Team.’ If ‘Player’ is selected, the tab will read ‘Player.’
Sport: This field allows you to select the sport your program will be featuring.
Registration URL: The Registration URL is the link that will take you to the registration page for your program. The last four numbers of the URL are the ID numbers for the program that appear on the main admin page. This Registration URL is the link that you will publish.
Active/Inactive Status: Both the ‘Active’ checkbox and the ‘Signup Deadline’ fields control whether registrations will be accepted. However, making a program inactive additionally will move it to the ‘Inactive’ list of programs. You will typically use this checkbox after your league/tournament is over and you no longer want to see it on your primary list of programs.

Please note there is an Offline Text field. This gives you the option to add Offline Text to be displayed when a person tries to register. For example, you might setup a program and then make it offline with an offline message of “Registrations will start on 8/1”. An event must be active and offline in order for the offline text to be displayed.
Payment Types Allowed: ‘Payment Types Allowed’ lets you choose the payment options you want to make available to participants of your program (credit card or check). Check each box that you want to include.

Recurring Billing: We offer recurring billing, or subscription-based billing. This feature is only enabled when requested; contact us if you are interested in offering recurring billing. See Recurring Billing
Program Items: Use ‘Program Items’ (pictured below) to build the list of items displayed in the dropdown on the registration page. Minimally you must fill out labels, descriptions and prices (either team amount or player amount).

Label: This is the short name of what you are signing up for and will be displayed in the dropdown.
Description: This is the information that will be seen on the registration page after you select a dropdown item.
Active: The ‘Active’ checkbox determines whether or not the program item will show up in the dropdown box on the registration page. If it is unchecked (inactive), it will disappear from the dropdown menu. An example of using this feature is if a certain division/age group has reached the maximum registration. That division/age group can then be made inactive so no one will be able to register for it any longer.
Max. Reg: This limits the registrations per dropdown item. For example, a basketball program uses it to limit the amount of first and second grade basketball registrations.
Key: The key field lets you specify a unique value for a dropdown item so that you can deep-link to a specific option. For example, if your registration URL is https://registration.htgsports.net/default.aspx?id=10101010 you can append "&key=MYKEY" to the url (where MYKEY is the value you've entered in the key field). That will then automatically select that item when the user clicks on the registration url.
Is Partial: A partial registration is used for when the initial registration amount is less than the total amount. You will use this for a registration where you wish a deposit to be paid up front and then the rest will be paid at a later date. Is Partial is used in conjunction with the Total Amt field.
Total Amt: This specificies the total registration amount. For example, the player/team amount might be $100 and the total amount could be $500 and after the registration the person would owe $400. Total Amt is used in conjunction with the Is Partial field.
Maximum Registrations: Use ‘Maximum Registrations’ to limit the number of teams/players in the program (max. registrations can be set by the upper age group/item in the ‘program items’ line). Input zero for no limit. Note that this limit is across all program items (e.g. if you set a limit of 250 for this program that would be a total 250 teams/players across all program items).

Age Groups: Use ‘Age Groups’ to specify the options you want displayed for your program. They will be displayed on the registration page as shown below. Note that the Age Groups feature is only shown if it’s a team-based event (e.g. tournament or league).
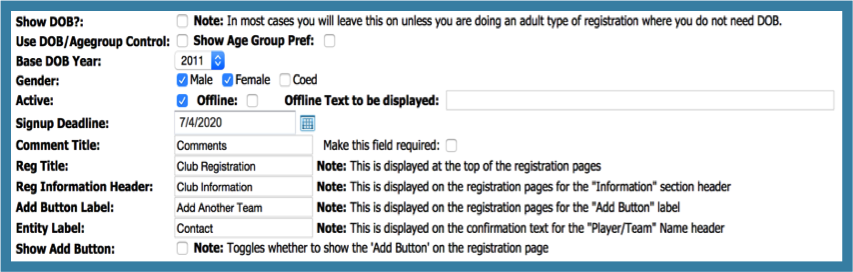
Show DOB?: Have this box checked to show date of birth for participants. In most youth events, you will want this on but for adult leagues you may not need date of birth. Note that this field is only used for Player type of events.
Use DOB/Age group Control: Have this box checked to set restrictions based on the date of birth/age group of participants. Note that this field is only used for Player type of events.
Base DOB Year: The base DOB year setting is used to set the label on the age group control so that registrants know what year to use in specifying the age group. For example, if you select Base DOB year to be 2008, the age group label will say ‘Age Group (’08-’09):’
Gender: Use the checkboxes to specify if the program is for females, males, coed, or any combination of the three. If you select two or more, those options will be available on the registration page.
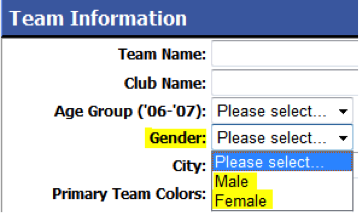
If only one option is selected on the edit page, then only that specified gender will be an option on the registration page.

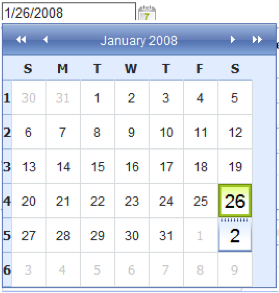
Signup Deadline: The Signup Deadline field limits the last date when registrations will be accepted. Registrations will be accepted through midnight on the specified date. The icon next to the field opens to a popup calendar. You can input the date by either selecting it on the calendar or typing it into the field.
Comment Title: This field allows comments during registration. This field can be required by selecting the ‘Make This Field Required’ option.
Reg Title: This is the title displayed at the top of the registration pages, for example ‘Team Registration’.
Reg Information Header: This is the heading displayed on the registration pages for the ‘information’ section header, such as ‘Team Information’.
Add Button Label: This is displayed on the registration page for adding registrations. In player events it is defaulted to ‘Add Another Player’. It can be modified to add another team, student, etc. The button can be changed to be more context appropriate. In the example below it is a team event, so it is defaulted to ‘Add Another Team’.

Entity Label: This is displayed on the confirmation text for the Player/Team name header, and should typically read ‘Player’ or ‘Team’.
Show Add Button: This is displayed on the registration page and allows the registrant to ‘add’ another registration.
Contact Information: Enter your contact information into the corresponding fields as shown below. The email address will be used for any communication with HTGSports.net, as well as the main contact address for the program. Confirmation emails for registration will automatically be sent from this email address.
Note: If you would like multiple people to receive copies of the confirmation email, they may be added to the email list separated by semicolons.

Clubs: Under ‘Club,’ confirm that your club/organization is selected. If you belong to more than one club, select it from the dropdown menu.

The ‘General’ tab information is now complete. The next step is to complete the information on the second tab: ‘Team’ tab for a team event or ‘Player’ tab for an individual event. The information entered controls what the public registration page will look like. The ‘Team’ tab and the 'Player' tab are discussed in the following sections.