Appearance
Managing Pools
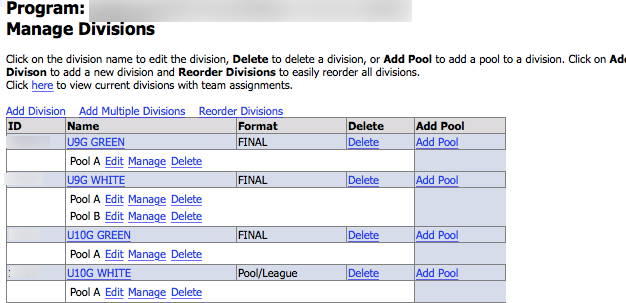
Once you have entered your divisions, they will appear on the ‘Manage Divisions’ page (pictured below). You can edit your pools by selecting ‘Edit’ and delete the pool by selecting the ‘Delete’ option after the pool name. The ‘Manage’ option is for assigning teams to pools, as described in the 'Managing Teams' section.
The picture below is an example of a tournament. If your event is a league, you will not have any pools in your divisions.

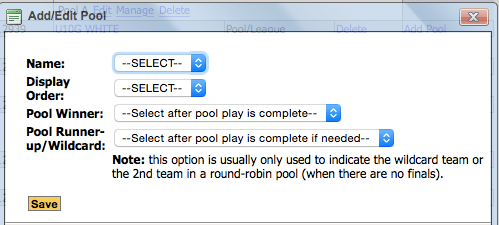
Select ‘Add Pool’ to add a new pool. A window will pop up allowing you to enter the pool information. Select ‘Save’ to preserve the new pool information. You can also select 'Edit' under a pool to change the pool name, display order, pool winner and runner up.

Under ‘Name’, enter a name for your pool. ‘Display Order’ is the order that the pool will appear in the pool list. Enter a low number, such as one, for a high order, and a high number, such as 300, for a low order. ‘Pool Winners’ can be selected after pool play is complete. For more information, see the 'Entering Division and Pool Winners' section. Select ‘Save’ to save the new information.